How to Host WordPress on Digitalocean - The Complete Guide (Part 1/4)
Recently I’ve performed a migration of predominately WordPress sites from a shared hosting environment to DigitalOcean Droplets and in the process I found many resources which helped make the process relatively painless. I was, however, unable to find one place which had everything I needed to setup WordPress on a Droplet from beginning through to end.
This is my attempt at collating this knowledge as a tutorial and providing some resources for further reading.
I’ve split it into 4 posts to make it more digestible.
- Creating a new Droplet and setting up users
- Creating and serving a static website
- Setting up MySQL and creating a WordPress website
- Setting up your domain name and sending emails from the server
Furthermore, this should be helpful for setting up any php application, as realistically, there isn’t a lot here about WordPress exclusively.
So, let’s get cracking.
Creating a new Droplet and setting up users
Assumptions
While most of this is guided, there is a bit of command line usage and some knowledge is assumed - I won’t be going much into this apart from explaining what we’re doing and why. It is not a bash or vim tutorial.
The assumption is also made that you have an account on DigitalOcean. If not, you can sign up for one here (using my referral).
Creating your Droplet
We will be setting up a LEMP (Linux, Nginx, MySQL, Php) Droplet on Ubuntu 16.04. If you need LAMP (Linux, Apache, MySQL, Php) you can follow on as its almost identical.
Log in to your DigitalOcean account and click on the Create Droplet button on the top right of the screen.
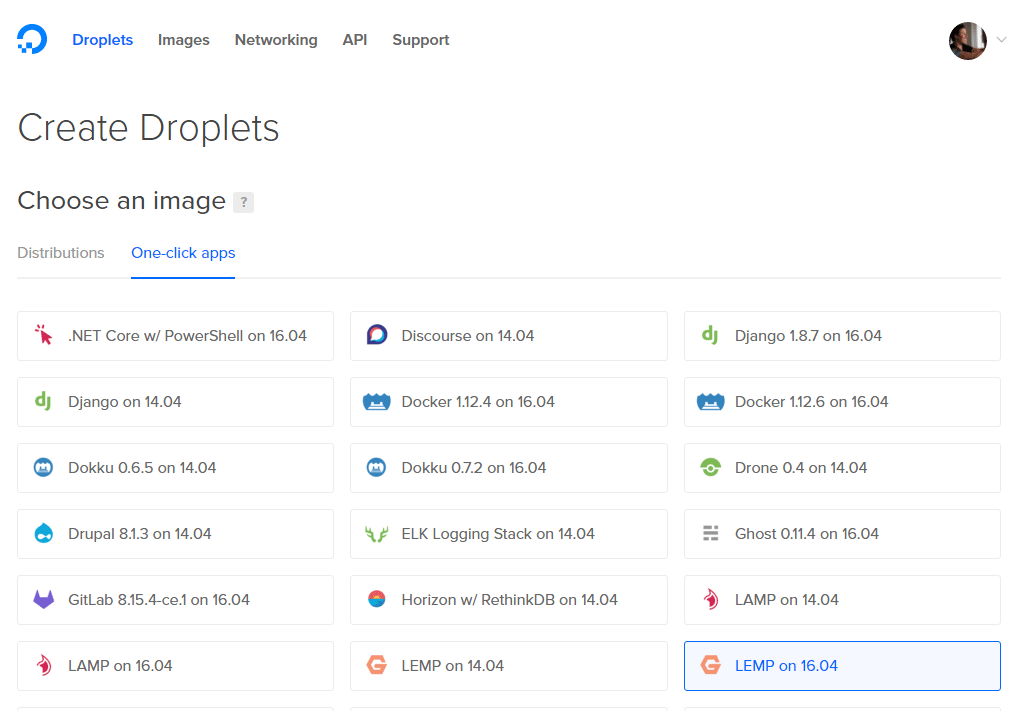
Select One-click apps and then find the item called LEMP 16.04 and select it. This will provide us a solid foundation with most of our setup already taken care of.
Next we need to select the size of our Droplet and this completely depends on your application requirements. For a small WordPress site the $5 a month option should suffice – but you can always increase the memory and capacity of your Droplet later on if you need.

Optional – The next option is block storage. Block storage enables you to add more space and scale easily, you can read more about it here. We will not be requiring it for this tutorial.
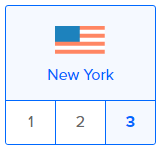
Choose the data center region which best suits you, we will go with New York 3.
Optional – Set any additional options you would like. We won’t use any in this example.
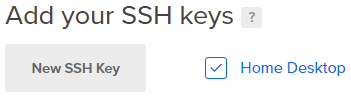
The next step is to add a new SSH Key – and this can be a bit tricky if you haven’t done it before. This tutorial over at BitBucket is by far the best tutorial I have seen for setting this up, so work through it and then continue on. Take your time though, you really need to get this right.
Then its time to finalise; select how many Droplets you need (usually 1) and give it a hostname that is clear and meaningful. You can change it later, but best to get it right at first if you can.

Click Create then sit back, relax and let it do its thing.
Before moving on, be sure to make note of the IP address assigned to your Droplet as we’ll be using this a bit. In our case it is 138.197.67.172. Also, you should now be able to preview that IP in the browser by visiting http://YOUR_SERVER_IP_ADDRESS/.
Logging into your new Droplet
Now we need move to the command line. If you’re on a Mac you have terminal, if on Windows you have a number of options. Putty is a popular one, though personally I love CMDer.
Log in to your new server with the following command:
ssh root@YOUR_SERVER_IP_ADDRESS
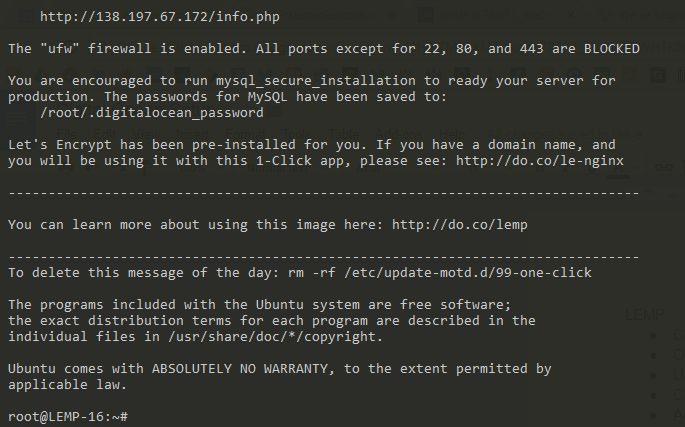
If you’re having any issues here, you’ve probably made a mistake when you set up your SSH key above. You should see something like the below screenshot when you’ve successfully connected.
Creating a new user
The root user is a super user and has access to everything, and while that is awesome and handy it can be risky being all powerful. Let’s setup a new user and get away from root as quickly as we can.
Create the new user, ours will be called michael, with the following command and follow the prompts:
adduser michael
Next we need to assign michael super user privileges so that we can perform super tasks when we need.
usermod -aG sudo michael
Finally, let’s add the michael to the group www-data. This is a group that the has access to our website files, by adding michael to this group, he should be able to work with our website files.
usermod -aG www-data michael
Lets add the abilty to log in to your new user over SSH with the password. Do do this you need the following:
vim /etc/ssh/sshd_config
Then find the line for PasswordAuthentication and change it to the following:
PasswordAuthentication yes
You can now log in with the following command (and the password you selected) instead of the root user above:
ssh michael@YOUR_SERVER_IP_ADDRESS
But, considering we haven’t logged out, we can simply switch to this user:
su michael
More information on setting up users can be found here. Furthermore, this article is very helpful in setting up a user account.
Connecting over FTP
You should now be able to log into your user account over FTP. There are a vast array of nice FTP clients out there but I think Filezilla is a client done right. It is simple, clean, fast and works on Windows and Mac.
You can connect with the following details;
Host: YOUR_SERVER_IP_ADDRESS (137.197.67.172)
Username: YOUR_USERNAME (michael)
Password: YOUR_PASSWORD
Port: 22