HOW TO HOST WORDPRESS ON DIGITALOCEAN – THE COMPLETE GUIDE (PART 3/4)
Setting up MySQL and creating a WordPress website
This is part 3 in the tutorial series “How to Host WordPress on DigitalOcean – The Complete Guide”. The other parts are as below:
- Creating a new Droplet and setting up users
- Creating and serving a static website
- Setting up MySQL and creating a WordPress website
- Setting up your domain name and sending emails from the server
Retrieving your MySQL root credentials
Earlier, when you set up your Droplet, it automatically created a file which contains the root password to your MySQL server. You need to find this and make note of it as we’ll be using it to log in and perform a little bit of setup.
You can view the contents of the file with the following command:
cat /root/.digitalocean_password
MySQL installation config
Next you need to run the MySQL secure installation wizard which will help secure your database server. It should be very straightforward, you need only to follow the instructions it provides. It will ask for the root password we acquired above.
Run the wizard with:
mysql_secure_installationAnd you will be asked the following questions (with my answer beside):
Enter current password for root (enter for none): ROOT_PASSWORD
Set root password? [Y/n] y
New password: MY_NEW_ROOT_PASSWORD
Re-enter new password: MY_NEW_ROOT_PASSWORD
Remove anonymous users? [Y/n] y
Disallow root login remotely? [Y/n] n
Remove test database and access to it? [Y/n] y
Reload privilege tables now? [Y/n] y
Set up a MySQL user and database
Having a website use the root credentials to connect to a database can be risky, its is better practice is to set up a user and grant it the correct privileges specifically to the schema we choose.
In order to do this, we need to access MySQL, but over ssh. The software I love for this is SequelPro, unfortunately it is only available on Mac. I’m working on my Windows machine right now… No fear though, PC has a “somewhat-bloaty-and-cumbersome” equivalent called MySQLWorkbench.
Connect to the database server
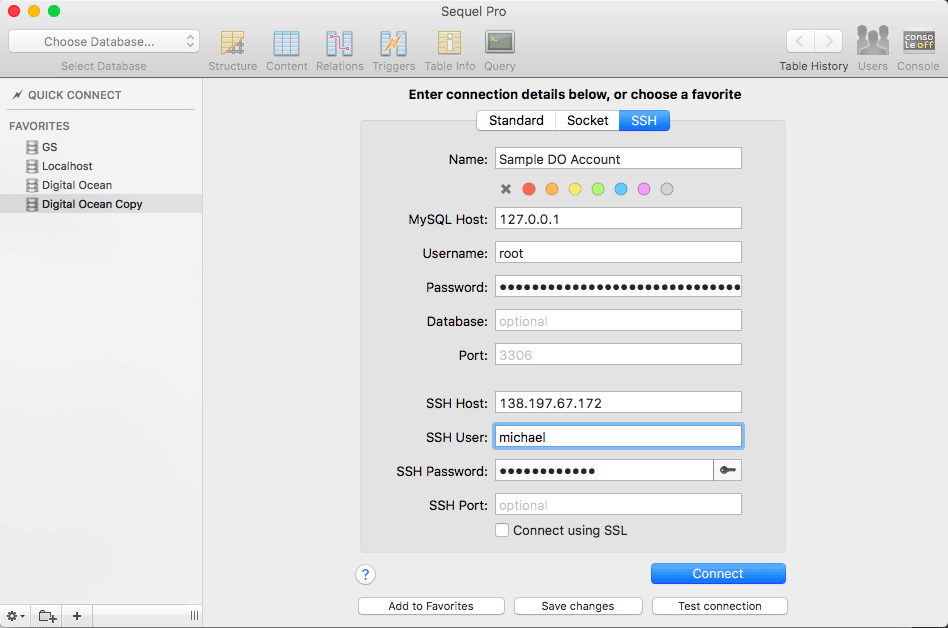
You need to create a new connection with the following credentials. Ensure that you are connecting over SSH or this will not work.
SSH Hostname: YOUR_SERVER_IP_ADDRESS
SSH Username: The SSH user you created (michael)
SSH Password: The pass for the user
MYSQL Hostname: 127.0.0.1
MYSQL Port: 3306
MYSQL User: root
Password: The root MySQL pass as used above
Punch in those details and then connect.
MySql Workbench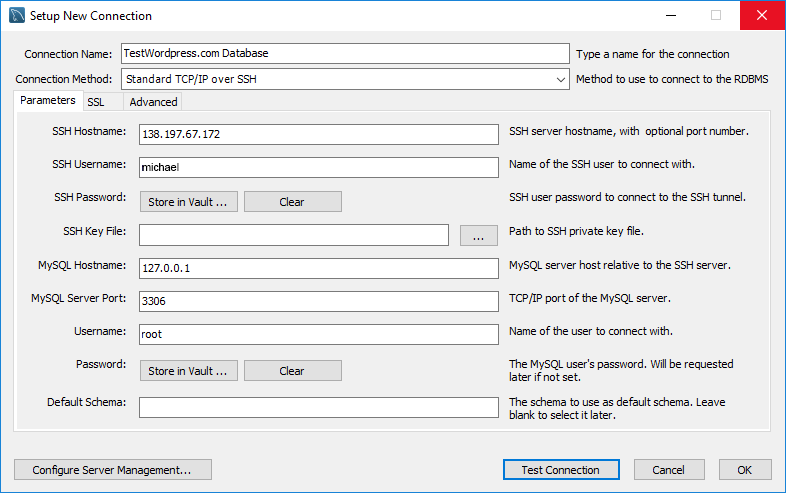
SequelPro
Create the new schema (database)
Find the Schemas section, in the left column, simply right click inside it and click Create Schema. Give it a name and click Apply and then Apply again.
You should now see your new database in the left hand column.
Create a user for the schema
Now find the Management section, which is also in the left column, and click Users and Privileges.
Select Add Account and enter a Login Name, Password and set the Limit to Hosts Matching to read localhost. When you are ready click Apply.
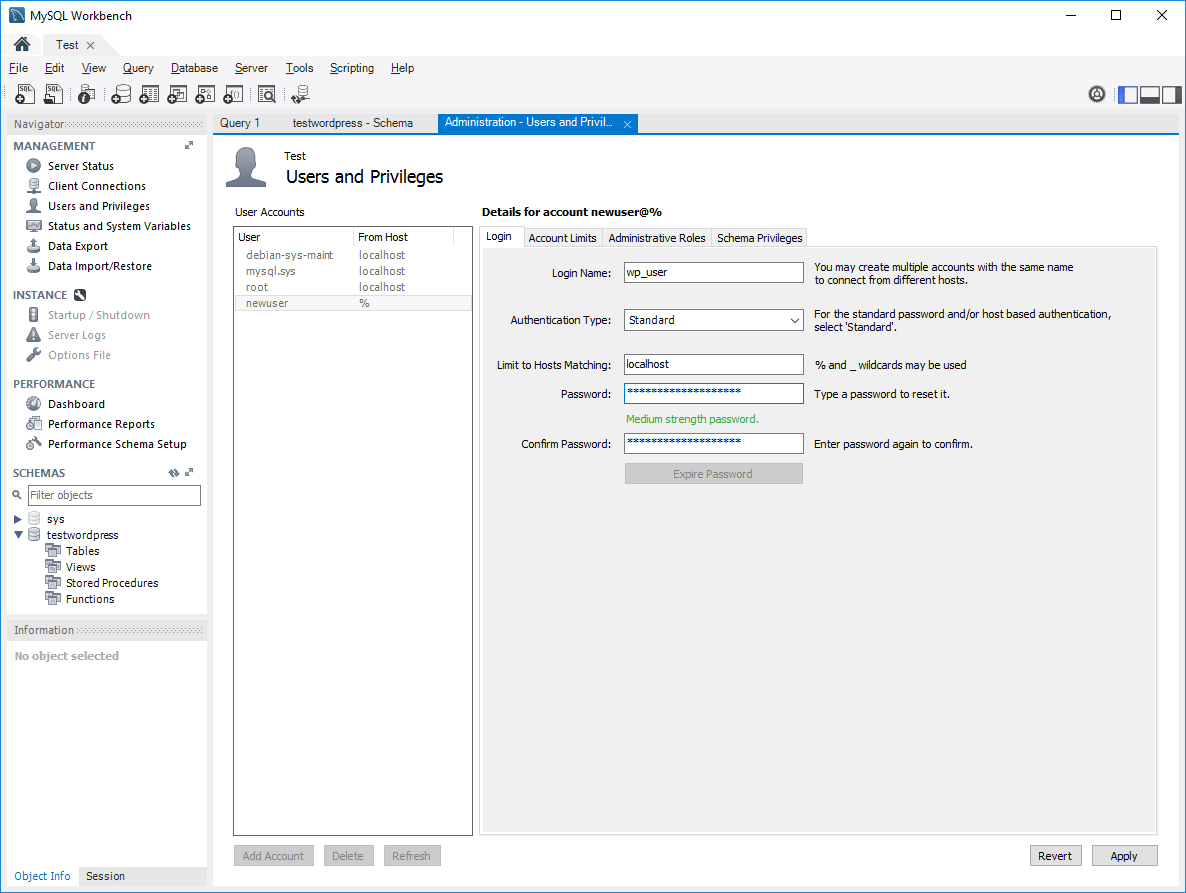
You now have a user. Now, we need to set the correct privileges. To do this, click on the Schema Privileges tab heading to change the view.
Click the Add Entry… button to pop up a window.
Select the radio button titled Selected schema and in the dropdown beside it, pick your new schema from above.
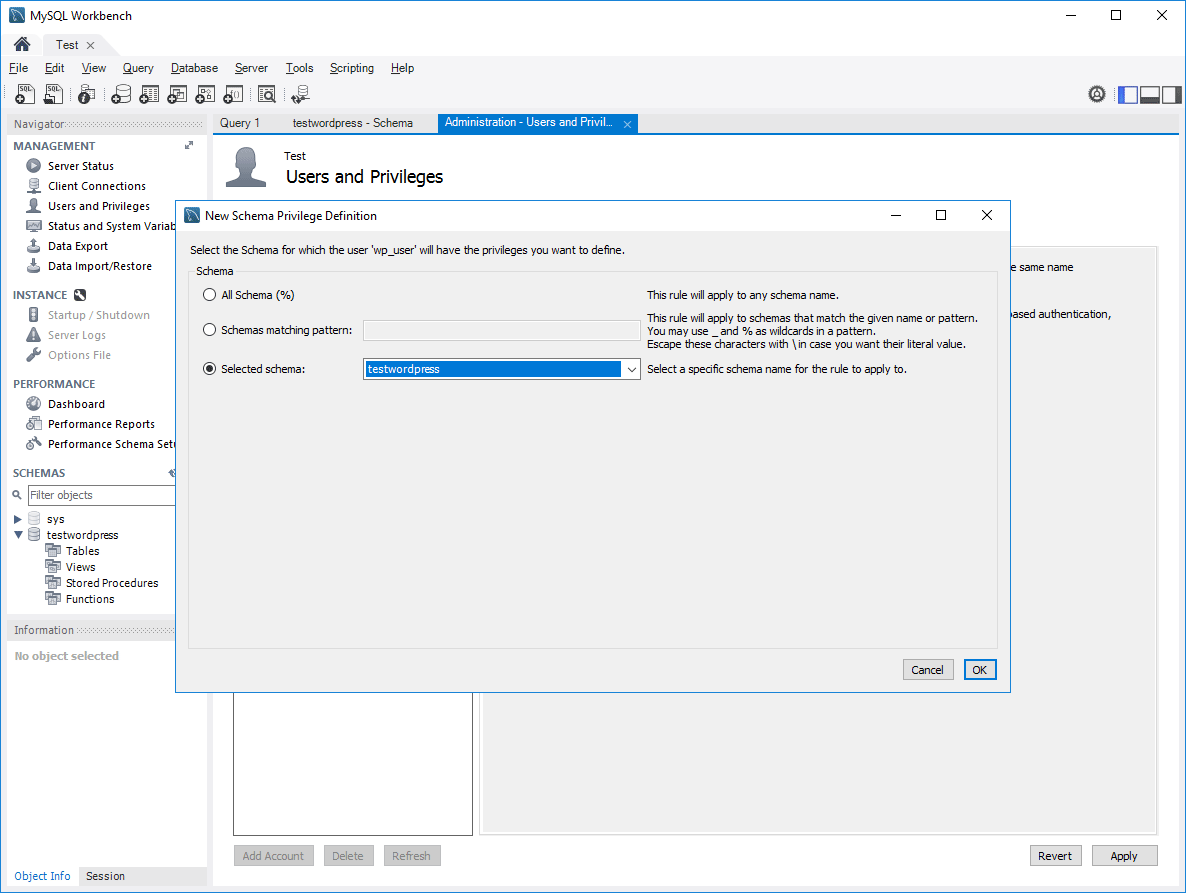
Click Ok, then click Select “ALL” and finally, click Apply.
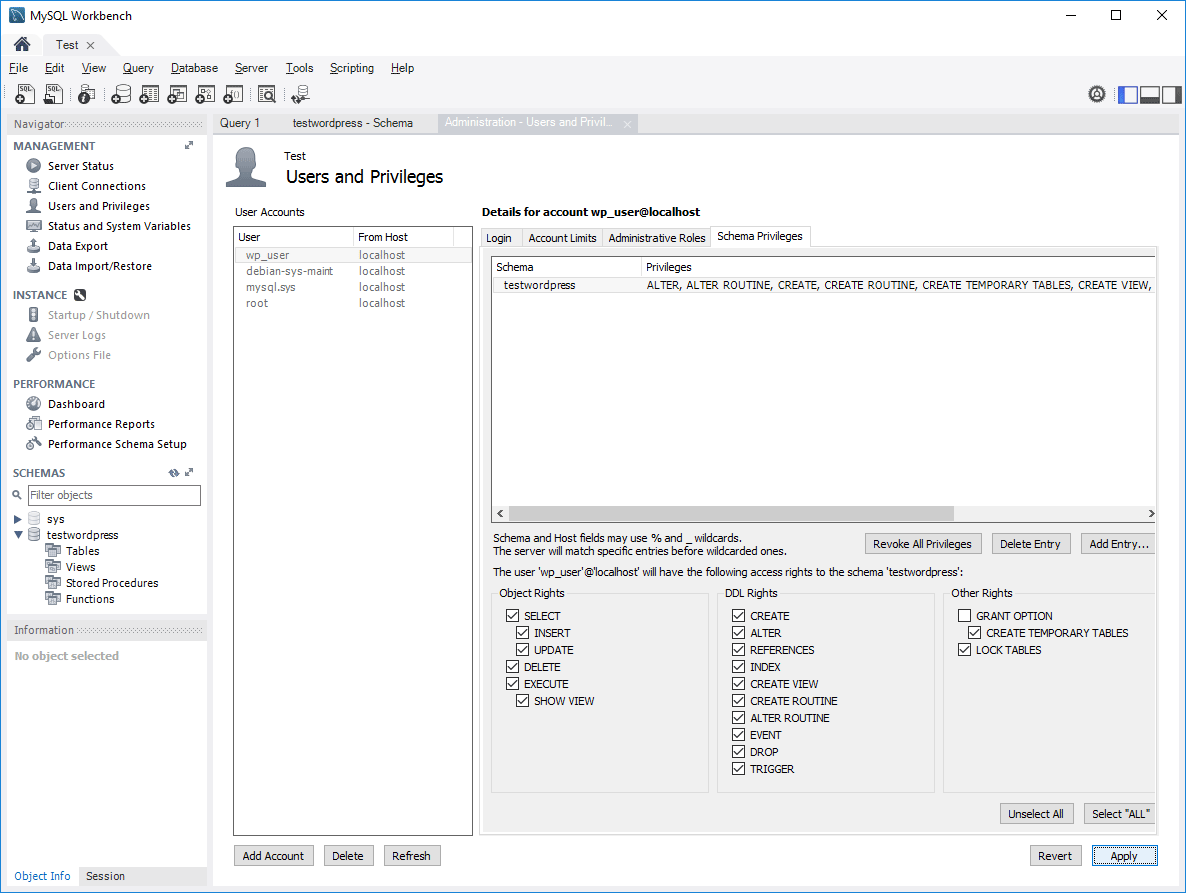
So we just did a lot there, what did we achieve? We created a new user, and gave it full rights to our schema. Any web application (e.g. WordPress) we host can now use this database.
Installing WordPress
Installing a fresh copy of WordPress over the command line is beautifully simple.
First we need to ensure that we’re logged in as the user michael. If not, switch to it with:
su michaelThen we need to ensure we are in our website directory:
cd /var/www/testwordpress.com/Lets delete the HTML folder we created in part 2: Creating and serving a static website.
rm -r htmlNow is the fun bit, enter the following command to download the latest version of WordPress to your current location:
wget http://wordpress.org/latest.tar.gzOnce completed, we need to unzip our tar file:
tar xfz latest.tar.gzYou should now have a folder in here called wordpress. Let’s rename this to html which will match what we have defined as our web root.
mv wordpress html
Finally let’s ensure the owner and group are set correctly:
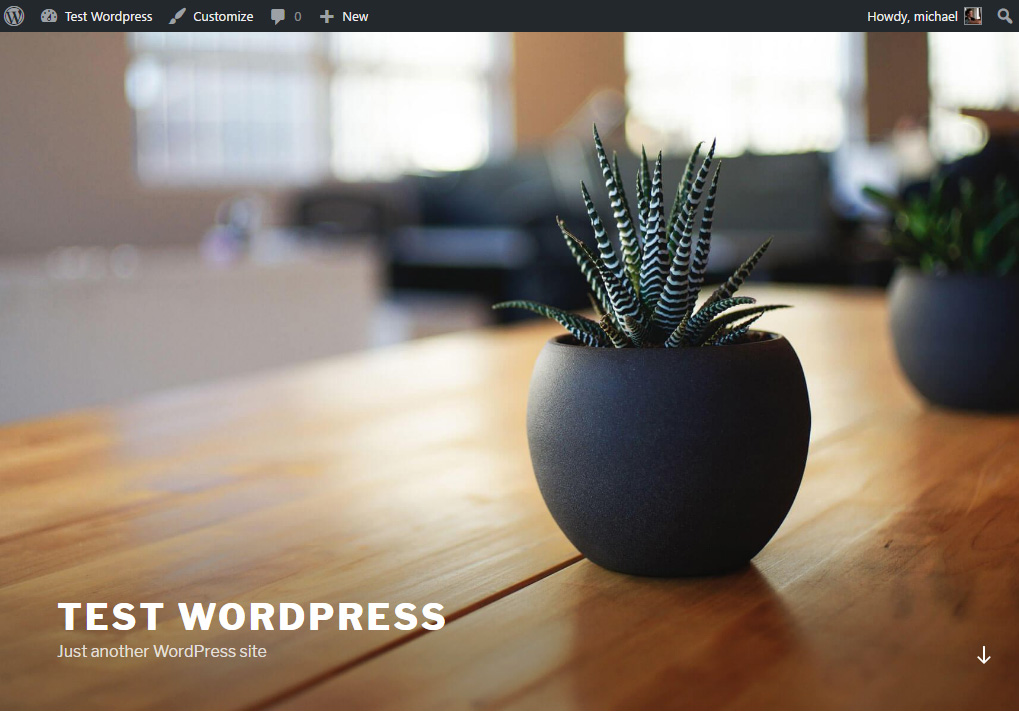
chmod www-data:www-data /var/www/testwordpress.com -RNow, assuming you’ve kept your host file updated as per part 2, you should be able to preview your website in the browser.
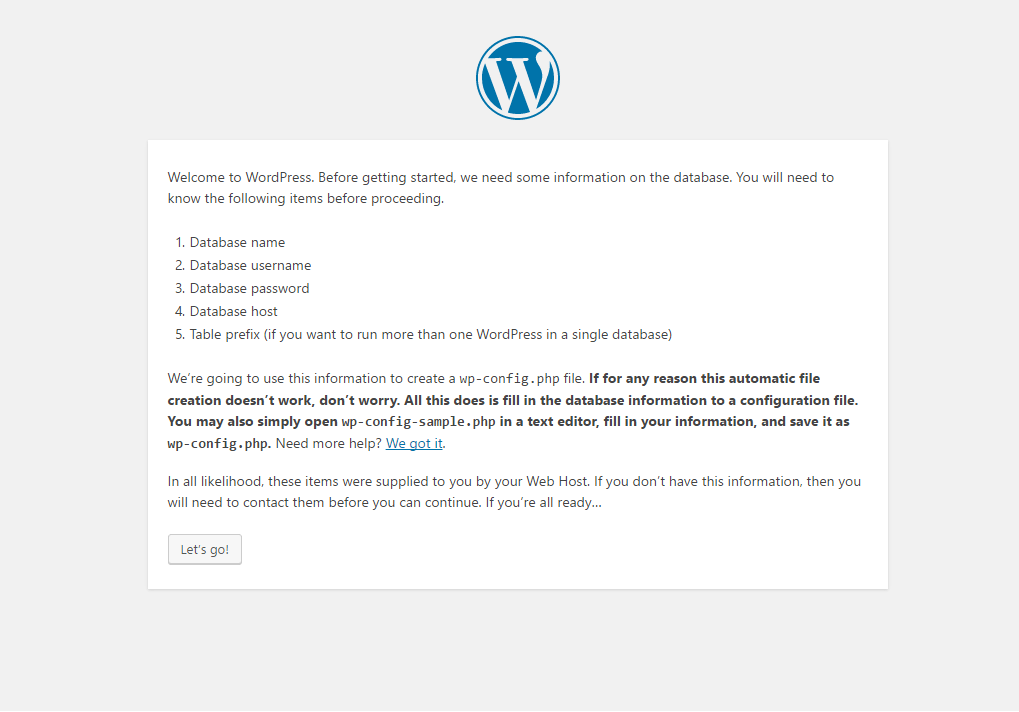
From here it is simply a matter of running through the usual WordPress Famous 5 Minute Install with your configured database credentials:
DB_NAME: YOUR_DB_NAME (testwordpress)
DB_USER: YOUR_DB_USER (wp_user)
PASS: YOUR DB_PASS (michael123)
After the install is complete, you should have a fully functioning WordPress website. Woo!
COMMENTS (0)